My $25.00 Facebook Market find transformed for Home Office perfection!
This post contains affiliate links where a small commission is received for the sale of products linked at no additional cost to you. I only partner or promote brands and products that I believe in or have tried myself.
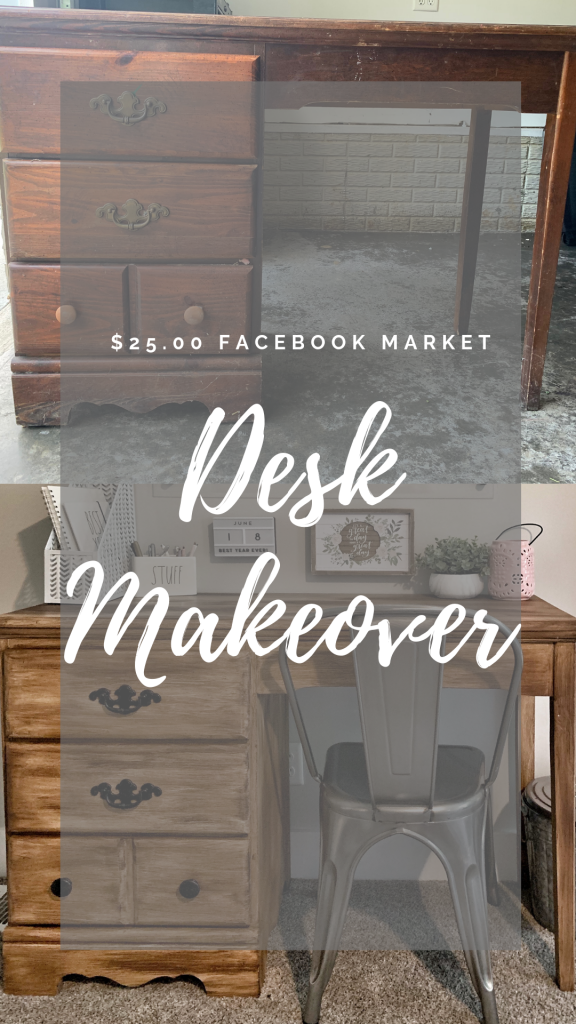
Now that my blog and Instagram have become more than just a hobby, I was on a mission to find a cheap desk to work on. I new I wanted to do an old desk makeover. I love everything organization-related so I wanted a place where I could track all of my Bold Boundless Blonde obligations. One day when we finish the basement and we build rooms for the kids I will have a nice big office in what is now my daughters room – complete with shiplap and a crystal chandelier. However, for now I had to settle for a small work space that would fit in our master bedroom. I hopped on Facebook market and found this beauty for $25.00! Originally, I planned on sanding and staining it to restore its original beauty.

Yuck…. When we arrived to pick it up I realized it was in fact not a solid wood desk as advertised. More of a mixture of pressed wood, wood, and plywood. However, I am impatient and we were already there so we loaded it up in the car and I came up with a new plan! The FIRST thing that I ALWAYS do when bringing home used furniture is douse it with bug spray and let it sit for a few hours. You just never know and I am not willing to take any chances.
After letting it set, I began to wipe down the desk to remove all dirt, dust, and cobwebs. I then removed the drawers and swept them out. Finally, I removed the hardware from the draws and I was ready to get started.
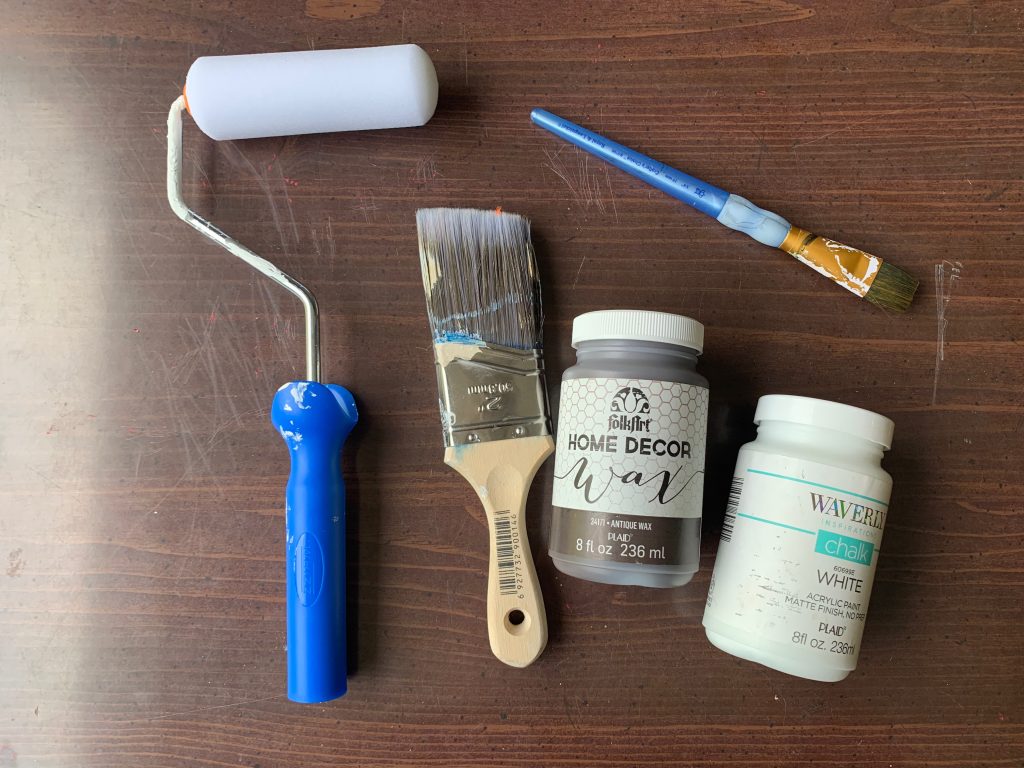
Supplies
Getting Started On Your Old Desk Makeover

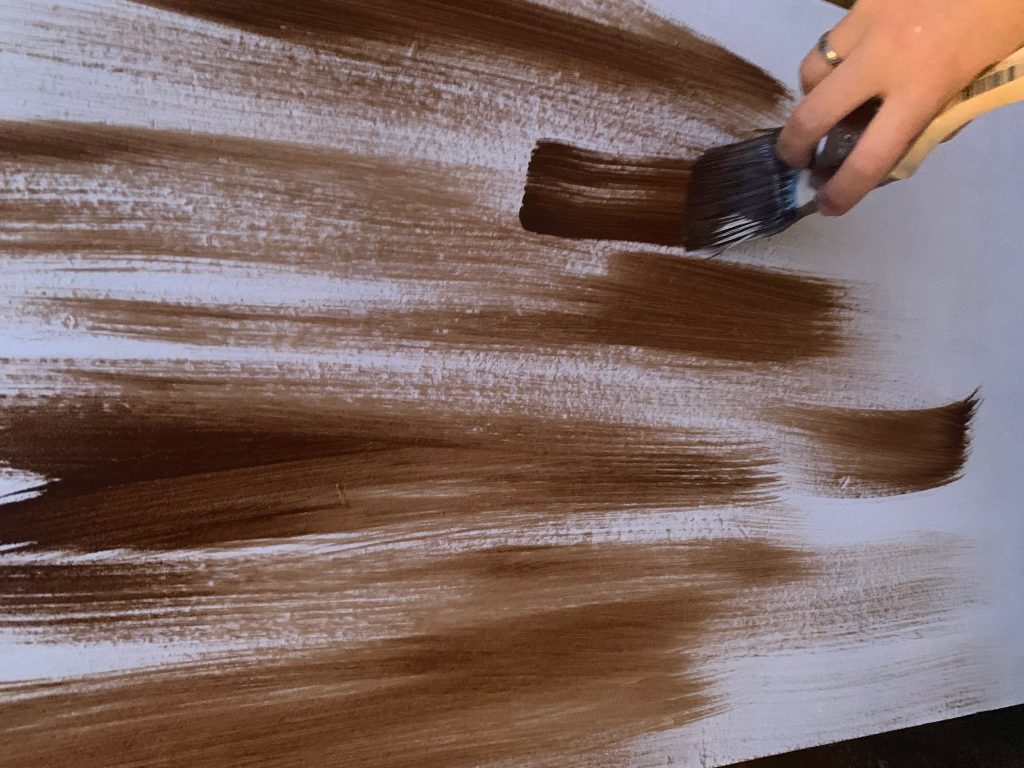
I didn’t have a paint tray on hand, so I decided it would be a good idea to just dump the paint on top and get started. This worked fine for the top coat – however, I was a little too impatient for the second coat, tried to do the same thing again, and see exhibit A below of why you should NOT do this.
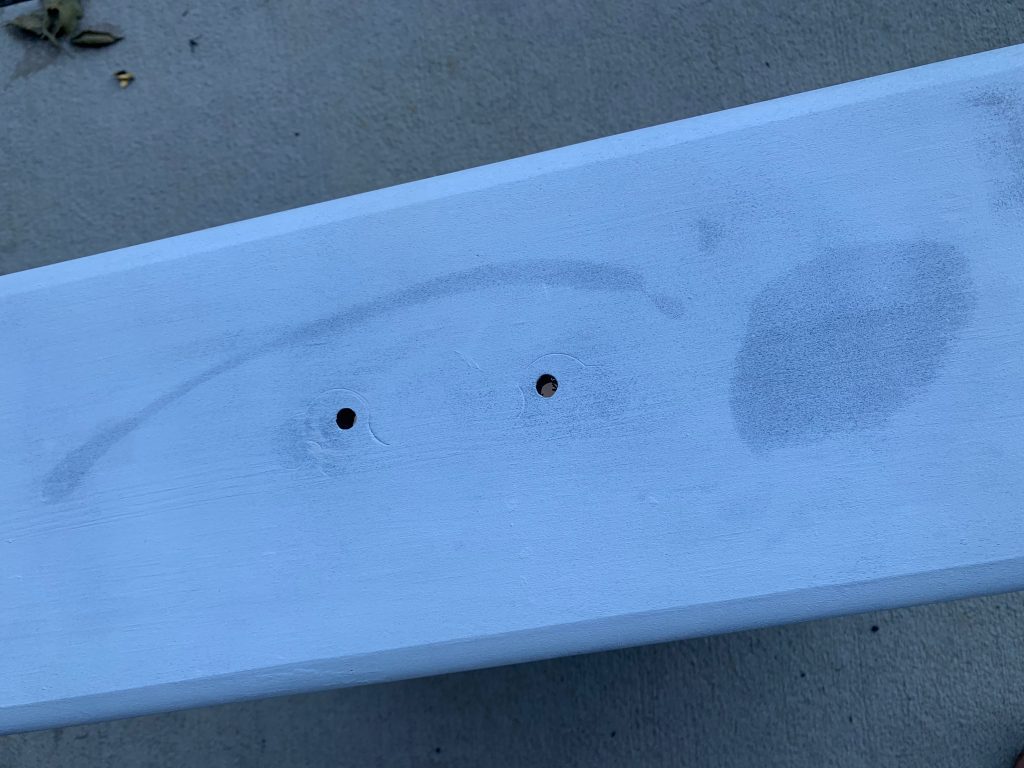
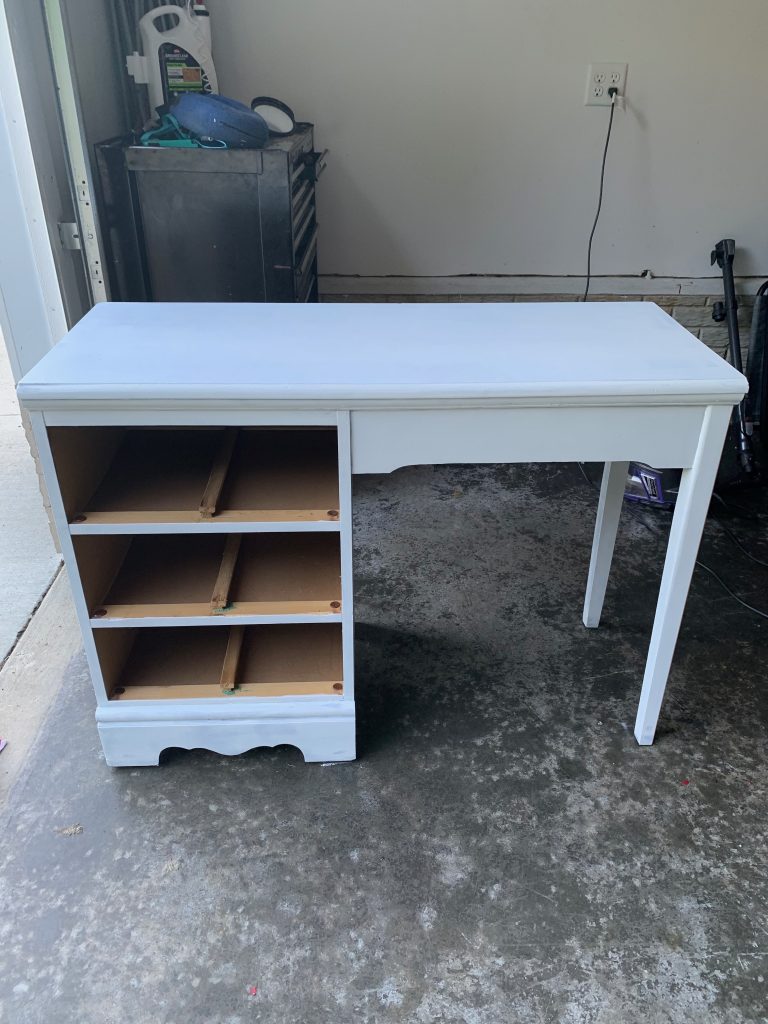
WOOPS! Oh well, at this point there was nothing I could do besides let it dry and add a third coat of paint. BUT – if I would have just waited for the first coat to dry I could have avoided this completely. I continued to paint the entire dresser until it was all white.
While I ever so patiently waited on the white paint to dry, I sprayed the hardware with my black spray paint. This took two coats as well. I recommend letting this dry for at least 24 hours so it is not tacky when you touch it and get finger prints all through it. Been there, done that.
Give Everything Time To Dry Completely!

Once the white paint was completely dry I began using my antiquing wax and painting it on long brush strokes at a time. I started with a little wax on my brush, but realized in order to achieve the look I was going for I could just dip that baby in deep because I was going to cover the whole thing. When you are doing your brush strokes fluctuate the pressure of your hand so that you get some darker spots. This helps it look more like wood grain.
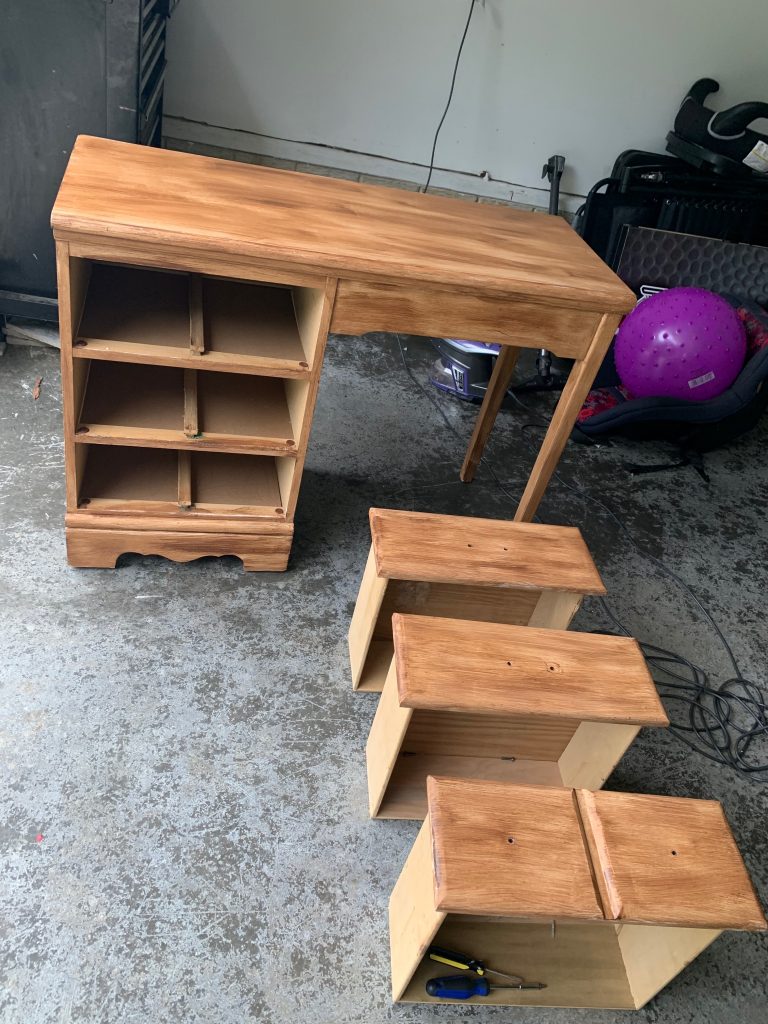
Please excuse my hot mess garage. It was definitely not photo ready. Once you achieve your desired look let everything dry for at least 24 hours! I started to put a polycrylic top coat on, but since this was chalk paint that did not turn out to well. Therefore, I do not suggest it. Another thing that I do not suggest is allowing toddlers around it… my daughter ever so sweetly laid her hand right in the wet polycrylic creating a hell of a smudge on the top. When I tried to fix it it got worse and worse until finally I had to wipe the entire top down and start fresh. Once everything has dried, install hardware and your desk is complete!
Finishing Up and Styling
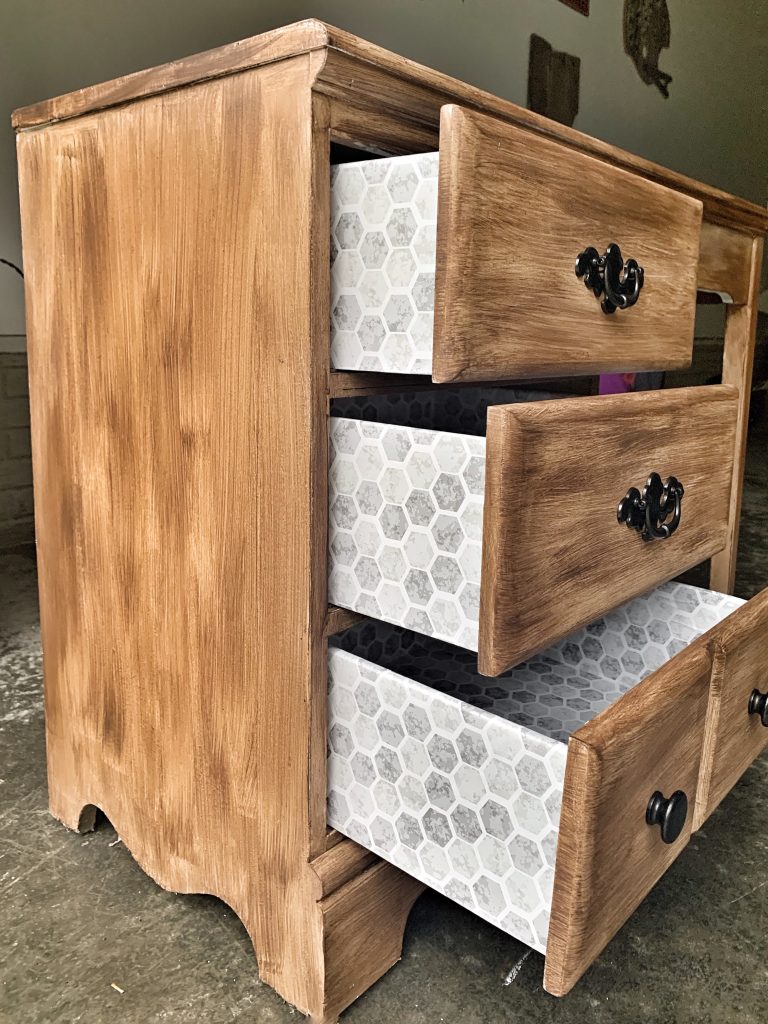
This next step is completely optional, but the drawers of this desk were disgusting. So I knew I needed to do something to cover them. I bought contact paper and just cut it into strips to cover the drawers. It made a huge difference!

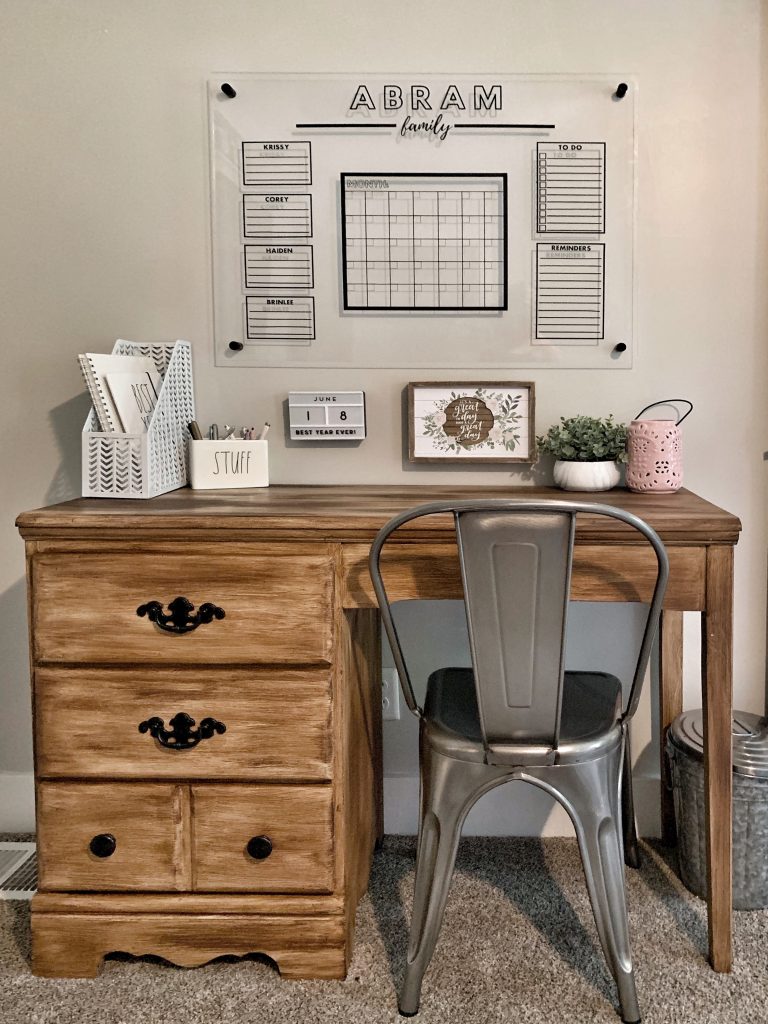
This old desk makeover was totally worth it! It fits perfectly in our room and will keep me organized! Our bedroom has the worst lighting so I ordered a lamp to help with the lighting over here. I also ordered a new chair (I stole this one from our kitchen table haha)! I hope you are inspired by my old desk makeover and have an itch to redo your own. Next time I will share my DIY Acrylic Calendar.
Hey there! I could have sworn I’ve been to this website before but after
browsing through some of the post I realized it’s new to me.
Anyhow, I’m definitely delighted I found it and I’ll be bookmarking
and checking back often!
Awesome! So happy to have you here! Thanks for following along!