Save hundreds by making your own custom acrylic calendar!

This post contains affiliate links where a small commission is received for the sale of products linked at no additional cost to you. I only partner or promote brands and products that I believe in or have tried myself.
I have had my eyes on these custom acrylic calendars for months! They are so functional not to mention a great statement piece. These calendars can run upwards of $400.00 depending on size, customization, and acrylic thickness. As much as I wanted one, that was not in the budget. I decided to sit down and decide how to make one myself.
I am going to be straight forward and tell you this project is NOT for a beginner. It’s not impossible, but I would say the DIY skill level needed for this is moderate at the least. Don’t worry, if you love this calendar but dont have the time, you can purchase a super similar one here! This calendar turned out perfectly and I am beyond happy with it. But it was not without much trial and error.
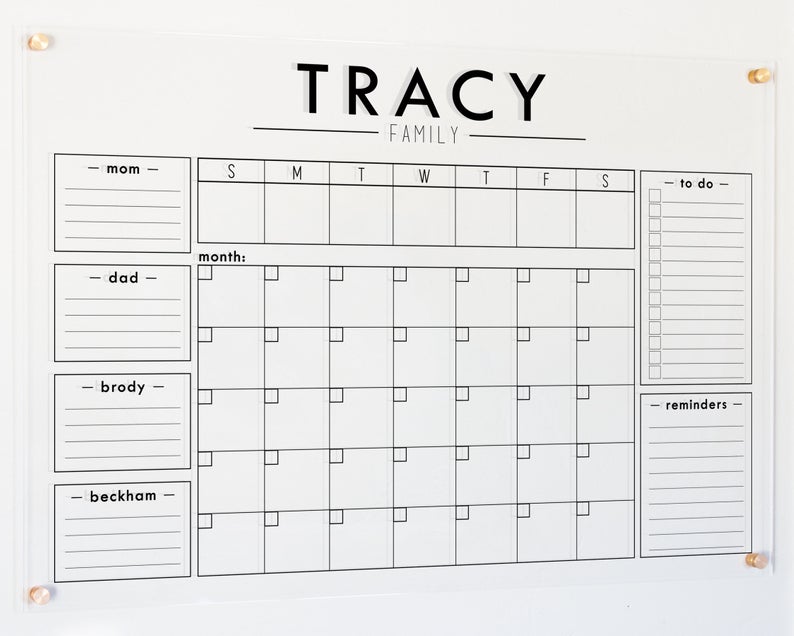
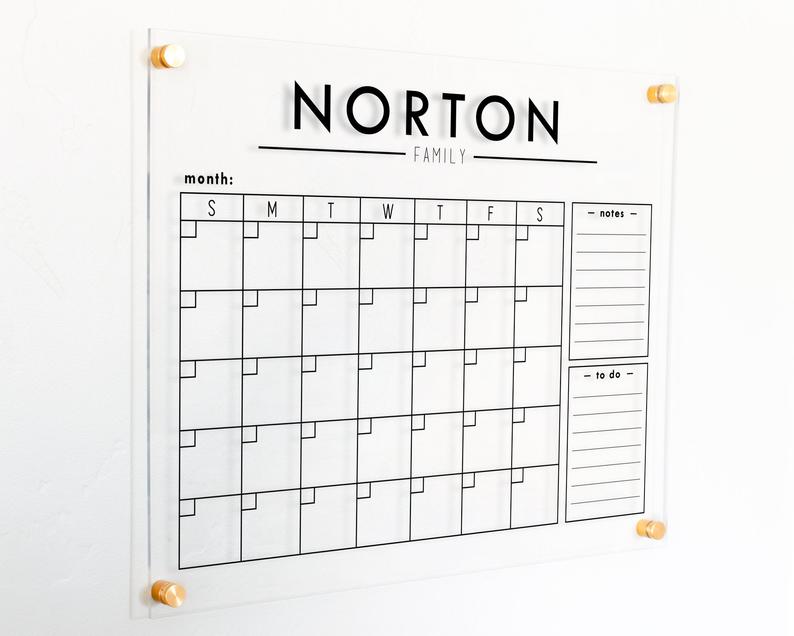
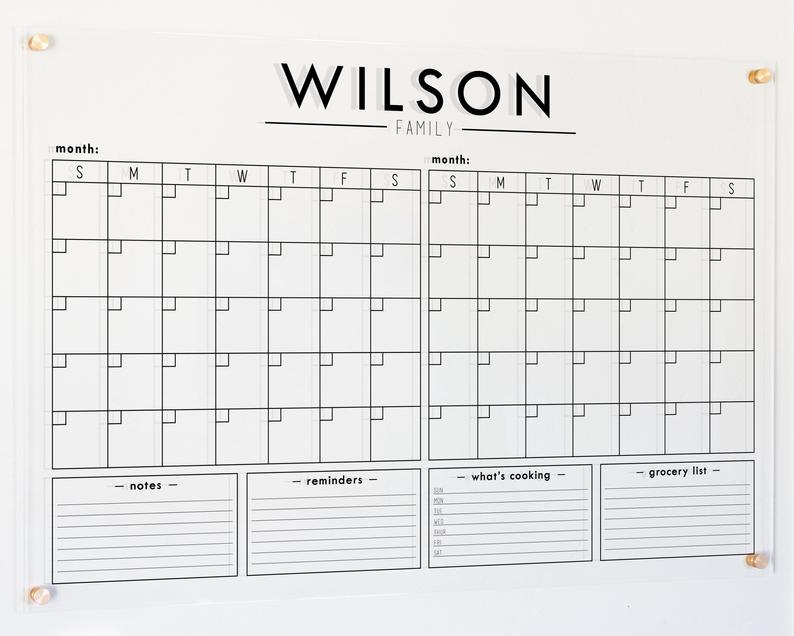
If DIY is not for you , you can purchase a super similar calendar HERE. These calendars are made by Celeste at Circle & Square Decor and are absolutely stunning! Her calendars are made with professionally printed ink so there is no worry about the vinyl peeling or rubbing off. She has many different designs to choose from. I highly suggest saving yourself the time and energy and ordering one from Celeste!
If you are feeling fiesty and still want to take on this DIY – lucky for you, I have worked through the issues and am able to provide a simplified tutorial for you to make your own custom acrylic calendar.
The Supplies
- 24 x 48″ .22″ Thick Acrylic – Click HERE – I had mine cut to 24 x 33
- Stand Offs – Click HERE
- OR
- Quartet Infinity Glass Dry Erase Board, 36″ x 24″ – Click HERE
- Black Permanent Vinyl – Click HERE – Minimum of 72″ I would highly suggest getting more to allow for re-cuts.
- Vinyl Transfer Tape – Click HERE
- Calendar Template – You can purchase my customizable template HERE.
- Cricut – Click HERE if you need one. – I would assume you could do this with other vinyl cutting machines as well but my experience comes from Cricut.
- 12 x 24 Cricut Mat – I prefer light grip.
- Drill Set
- Level
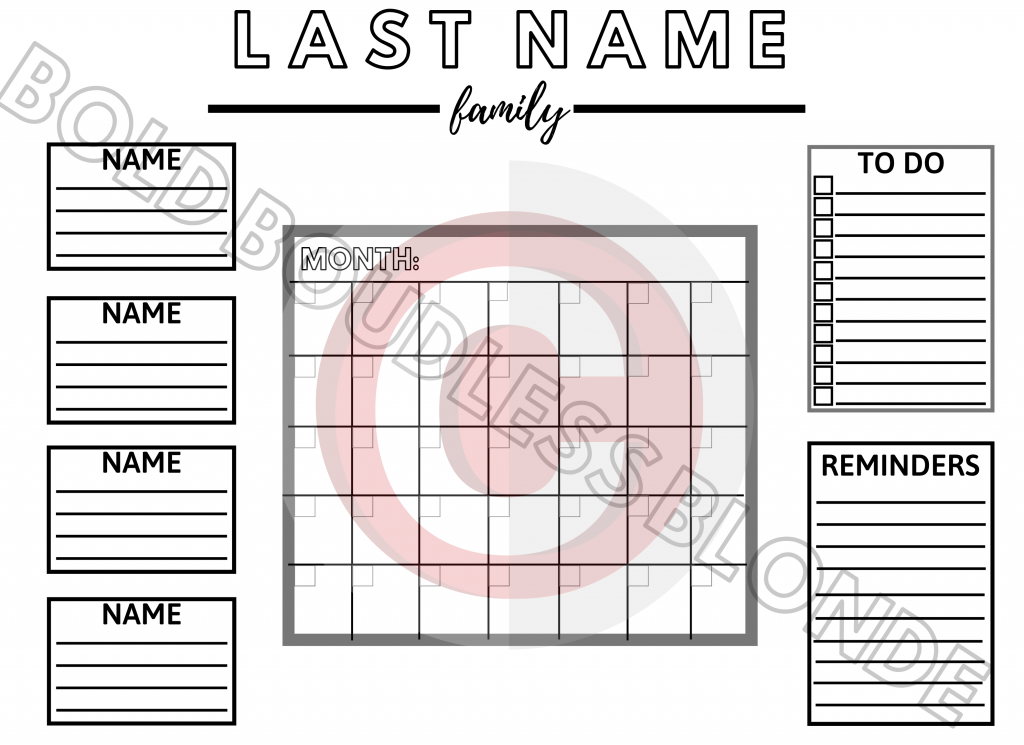
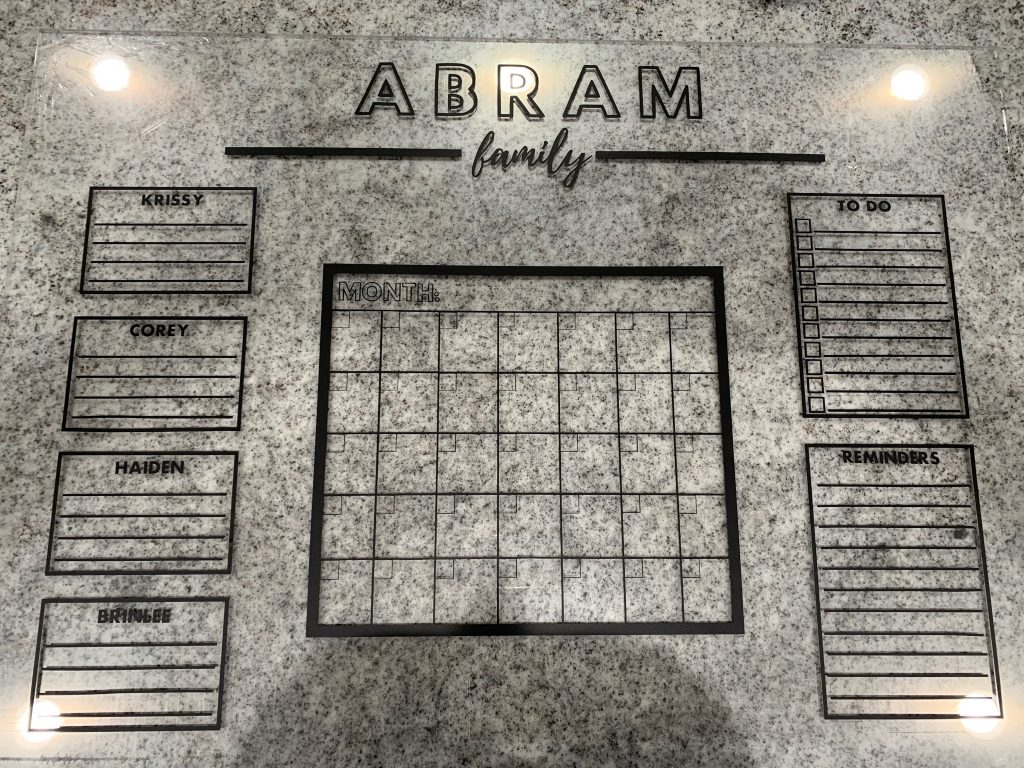
If you want to save yourself a lot of time and headache I highly suggest purchasing my template. However, if you want to make your own template I would suggest using Canva. Designing my template and working out the bugs took me about 4 hours and several adjustments. It looked great on the screen but when I cut it out it was a mess. I had to start over a few times and redesign it to make it more Cricut friendly. If you like the design of my calendar (example above) you can purchases my template HERE. Its completely editable so that you can customize it to your family names and needs. The following instructions will be based off of my template.
As an alternative to buying the acrylic and stand offs, you could purchase this pre-assembled glass dry erase board HERE. It is cheaper and would eliminate several of the steps below.
Getting Started on your Custom Acrylic Calendar
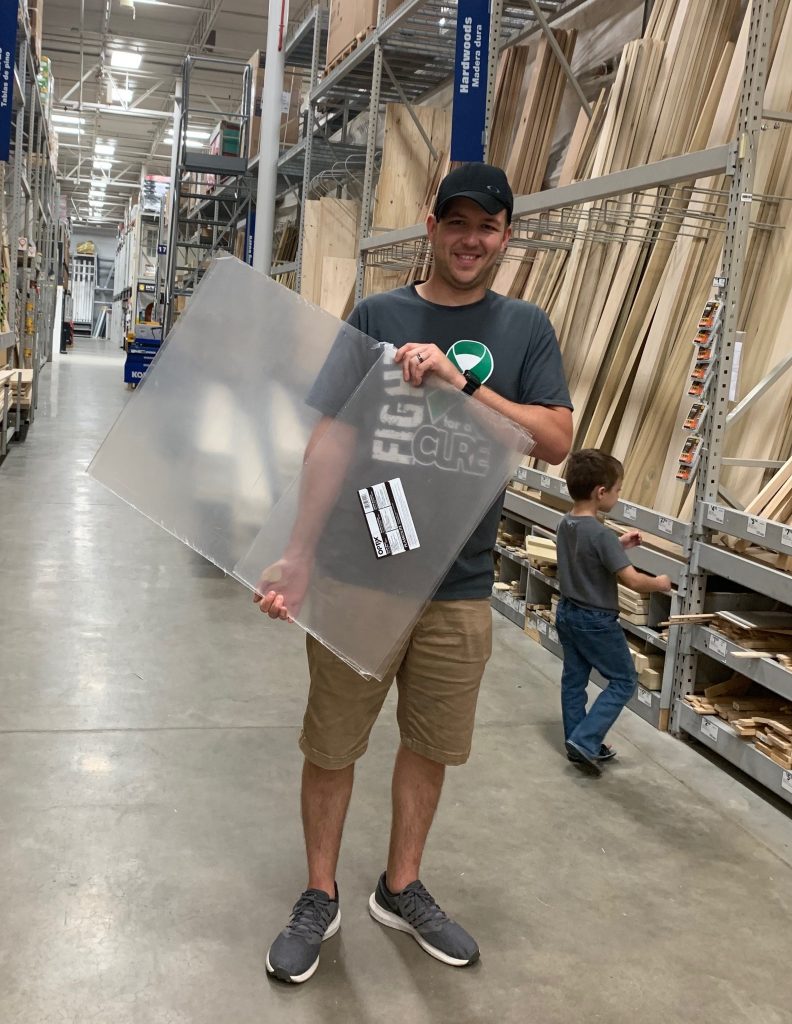
- When selecting the size of your calendar, you have to keep in mind that if you are using a Cricut you are limited to a 12 X 24 mat. I had my acrylic cut to 24×33, which left me with an extra piece about 15×24. I’m sure I can find another project to do with it later, so be sure to take both pieces with you!
- Collect all materials listed above
- Collect your patience because you are going to need it.
Uploading Your Template To Cricut Design Space
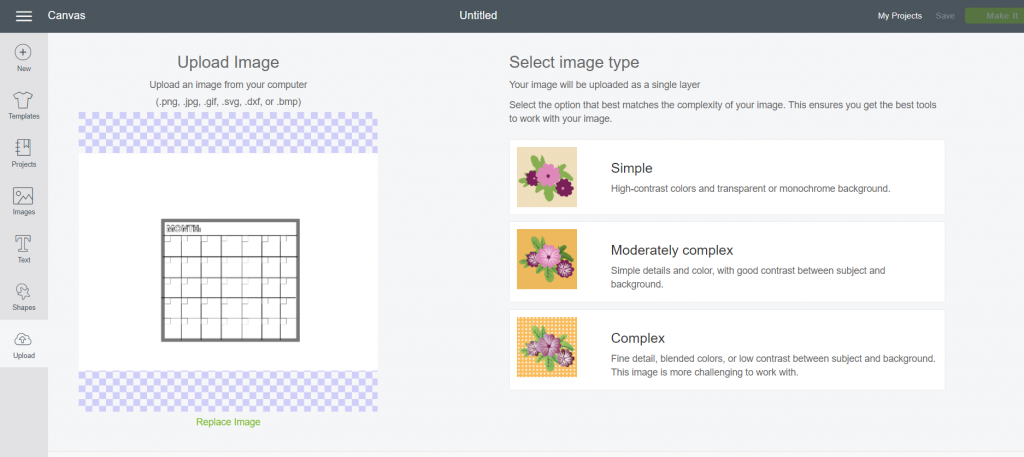
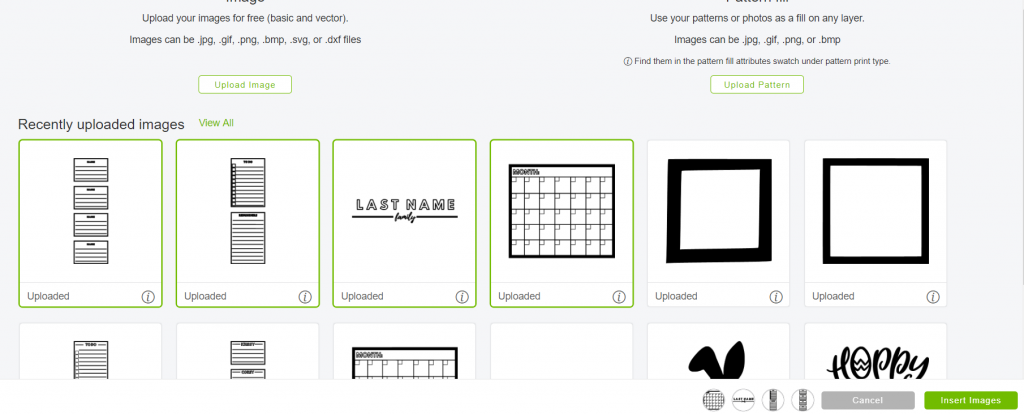
- Download your template (if you using my template, follow the instructions included with your download), upload into Cricut in FOUR SEPARATE IMAGES. You need to do the upload with a COMPUTER so that you can use the complex image type. If you try to upload it with the simple image type the lines will not be clean enough to cut and they will merge together.
- After you have your four images uploaded, the first thing that you need to do is resize your “calendar” image to be 11.5 x 12.974 so that it will fit on your 12×24 mat. Once you have your calendar sized, resize the other 3 sections to as large/small as you would like that will fit on your acrylic.
- When you have everything sized and ready to go, cut your images. CAREFULLY weed the vinyl leaving only what you want to transfer. CAREFULLY apply transfer tape and cut into four separate sections.
Applying Vinyl To Acrylic
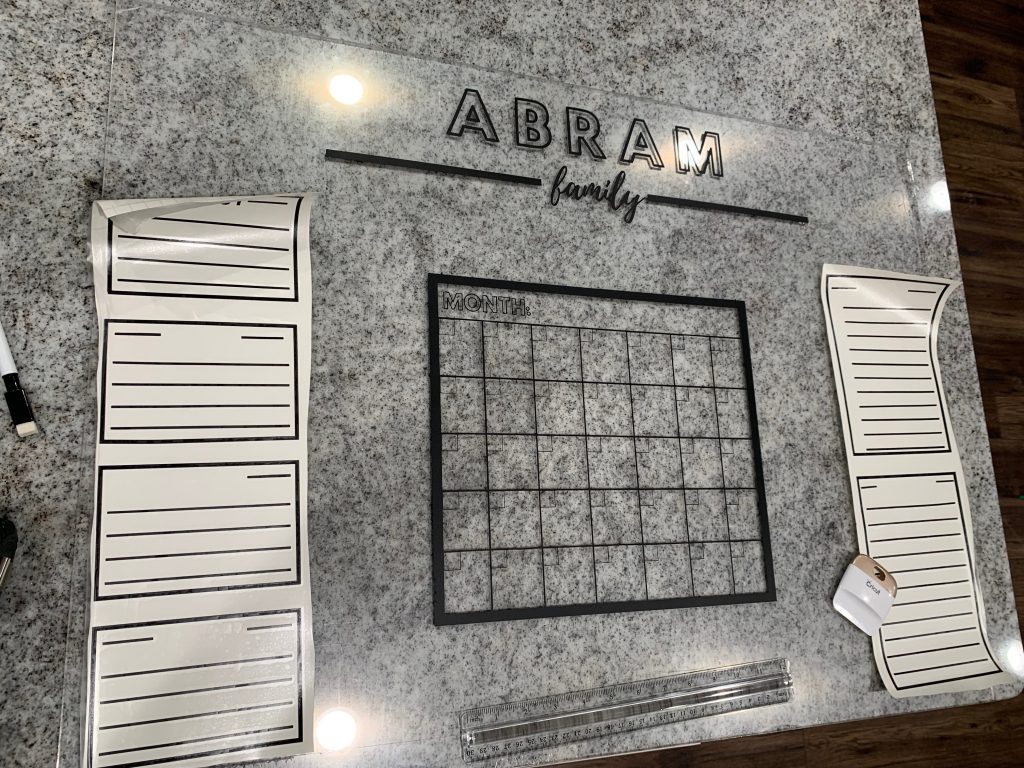
- Remove clear protective cover from the acrylic
- Layout all of your sections to where you want them to be
- Using a dry erase marker and a ruler, mark measurements to make sure that you are placing them exactly even. The marker will wipe right off when your done!
- Once you get all four sections applied, take a deep breath. The hardest part is over.
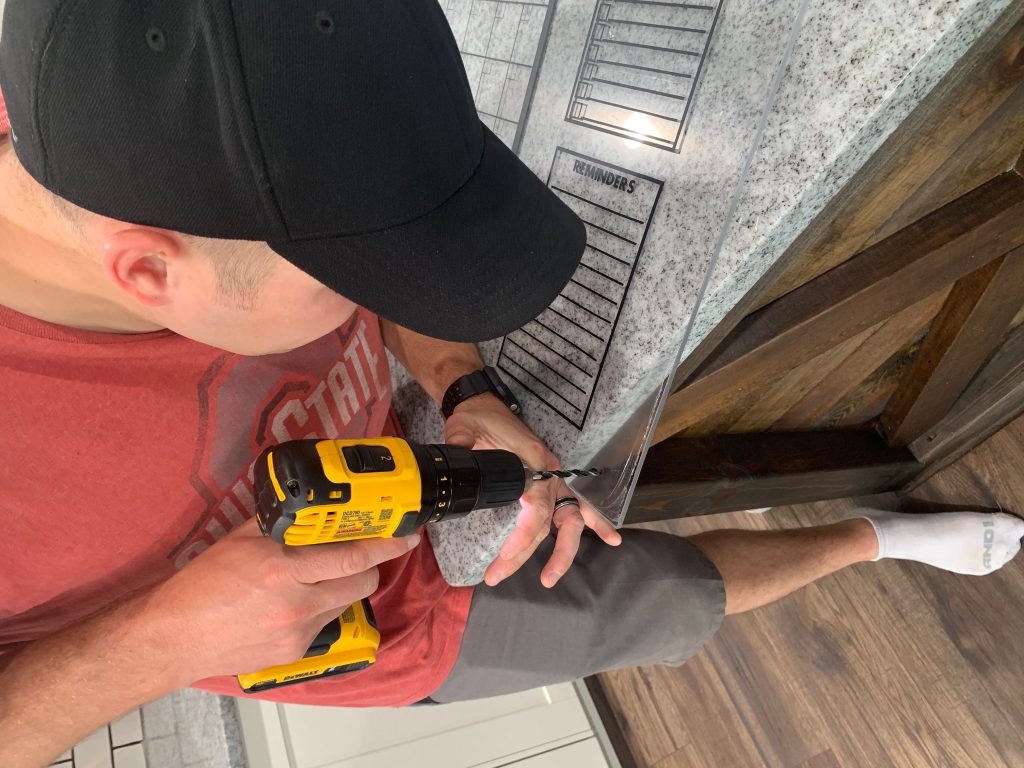
The next step is to drill holes in the acrylic the size of the stand offs you ordered. Make sure you hold on to your acrylic tightly so that you do not crack or chip it. We learned this the hard way, but the chip is small and covered by the stand off.
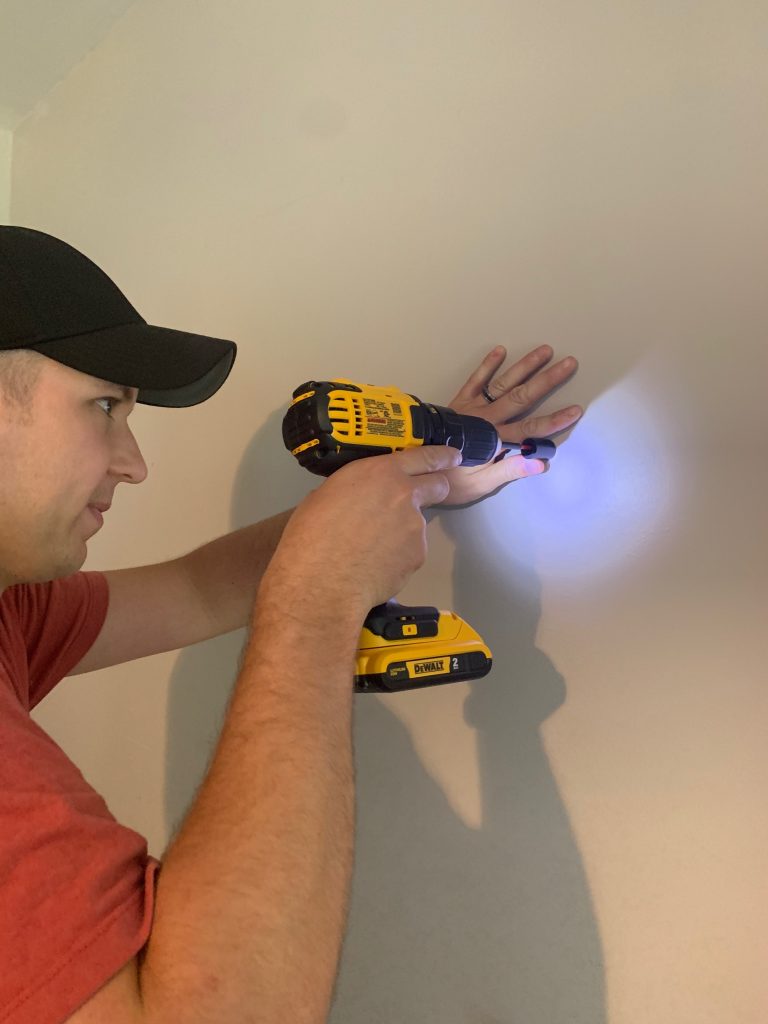
Hang Up Your Masterpiece
Hanging just happens to be the easiest part of this DIY. Since we had four holes drilled for the stand offs, we just held the calendar up, leveled it, and then used the dry erase marker to mark where the four holes are. Once you have your holes marked drill your holes in the wall and insert your anchors. Once you have your anchor in the wall, screw your stand off into the anchor. Look at my model husband, I promise he loves me. HAHA
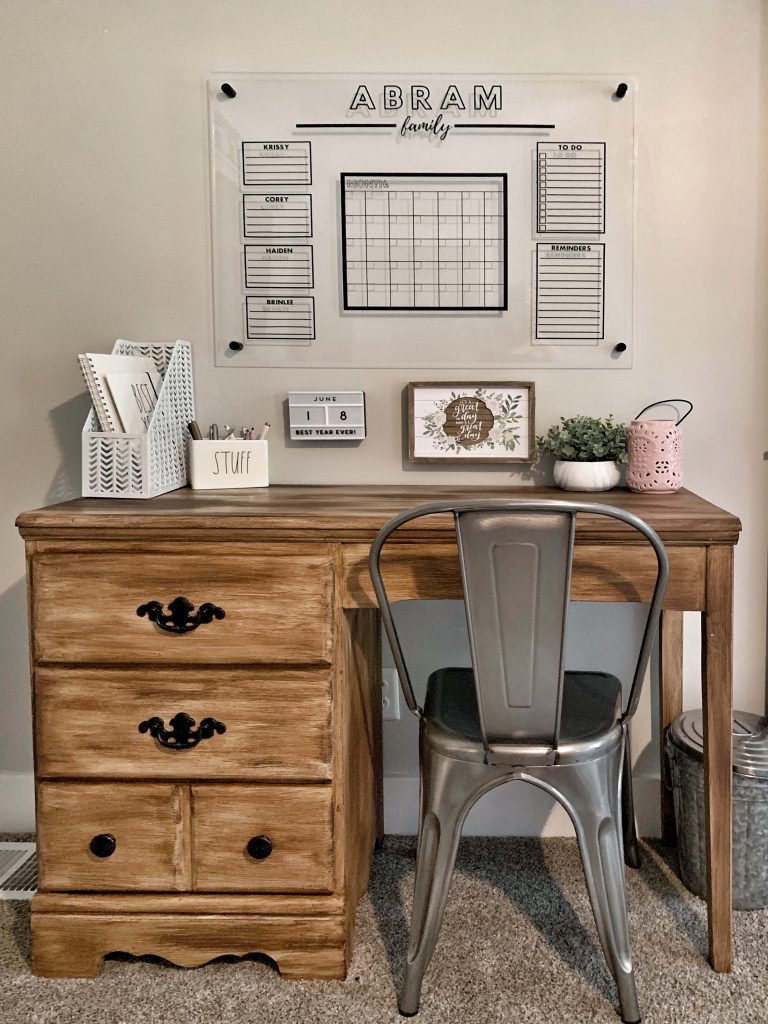
Finally, with help, hold your calendar up and screw the tops of the stand offs on on top of the acrylic. VIOLA! You have now made your own custom acrylic calendar!
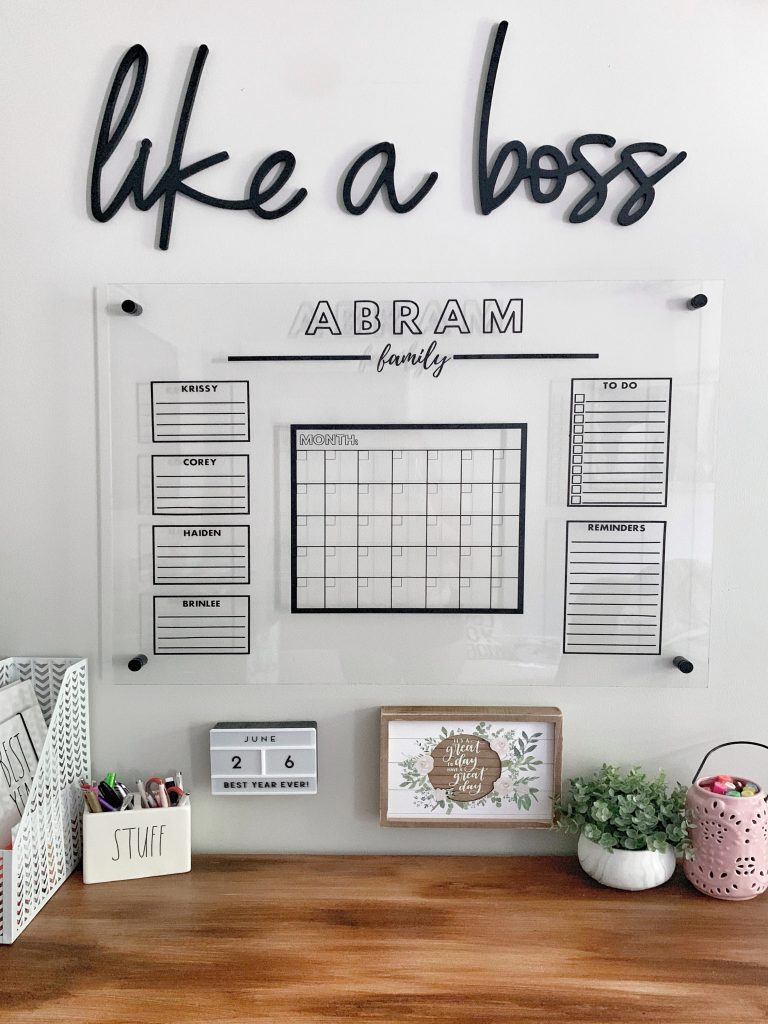
Custom Acrylic Calendar – DIY Perfection

Final Thoughts & Tips
- You can use wet or dry erase markers. HOWEVER, I highly suggest avoiding saturating the acrylic with water. Even though the vinyl is “permanent” it could still peel up with too much moisture or stress.
- Take your time. Rome wasn’t built in a day, and neither was this calendar.
- This DIY is far from easy, but it is so satisfying when your done. I am in love with my custom acrylic calendar at a fraction of the cost.
- If you have any questions please feel free to email me!
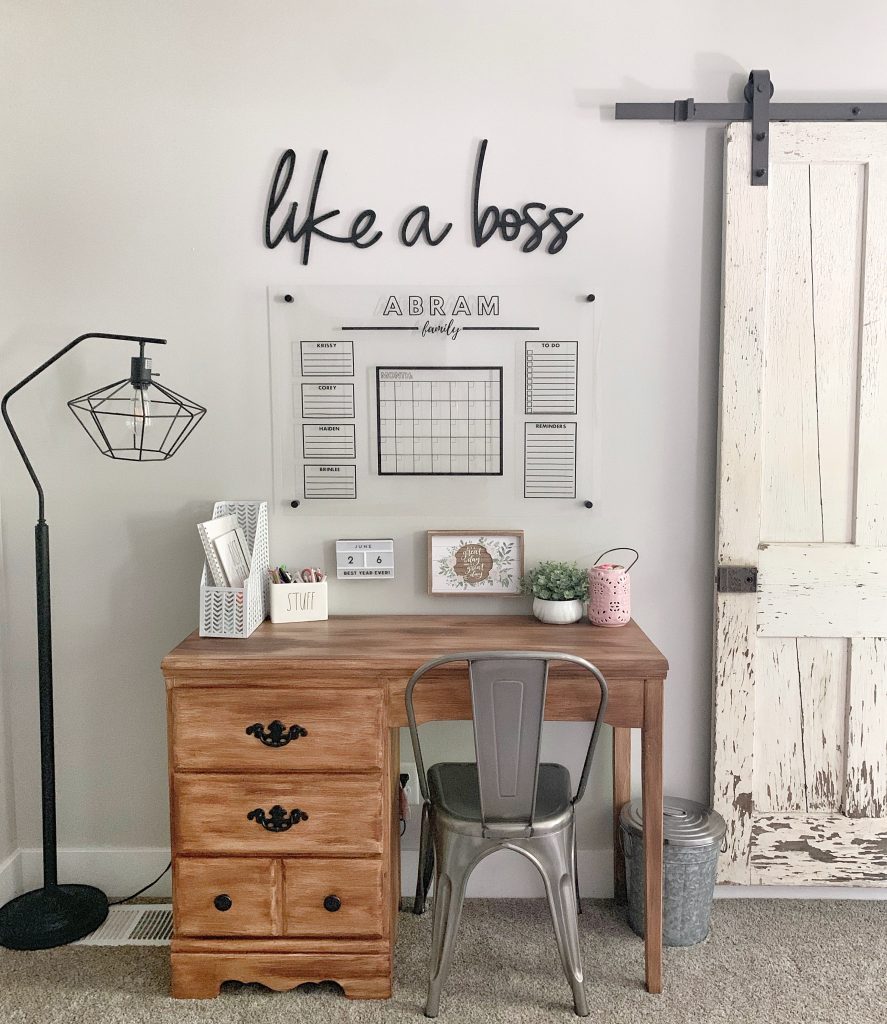
- Below are some additional photos of this gorgeous custom acrylic calendar. This truly makes the space. Check out my desk makeover here!
- SAVE YOURSELF THE HEADACHE! – BUY THIS ALREADY MADE CALENDAR FROM CIRCLE AND SQUARE DECOR HERE!!!!

[…] HOME WITH KRISSY . COM […]
I’m loving the lamp. Do you remember where you got it at?
It is from amazon! It is linked in the post 🙂
is that ladder basket organizer one of your projects? I’d love one of those!
It’s actually from Hobby Lobby! I got it last summer when they did their 90% off clearance!
Hi Krissy – can you share where you got the metal “like a boss” letters on the wall above the calendar? Would love to add that to my office space too. Super adorable!
They are actually like a pressed wood, and I found them at Hobby Lobby 🙂
Wondering if the template size can be modified? I want to create a calendar and household chore chart for my daughter and her 3 roommates.
Hi Taryn! The template is completely customizable! You can change size, fonts, everything!
Looks fantastic – you did a great job Krissy! Was excited to see your post after you messaged me on Etsy about being inspired by my acrylic calendar designs!
Absolutely! Your calendars are amazing and inspired me for sure! ☺️
I so love this, I wish I had a circuit. Maybe I can convince you to make one for me lol. You are so talented!
Thank you so much!! Maybe one day I’ll start making them for everyone who doesn’t have a cricut ☺️