Join me in taking my pantry from Hot Mess to Lookin Fresh in my Farmhouse Pantry Refresh!
This post contains affiliate links where a small commission is received for the sale of products linked at no additional cost to you. I only partner or promote brands and products that I believe in or have tried myself.
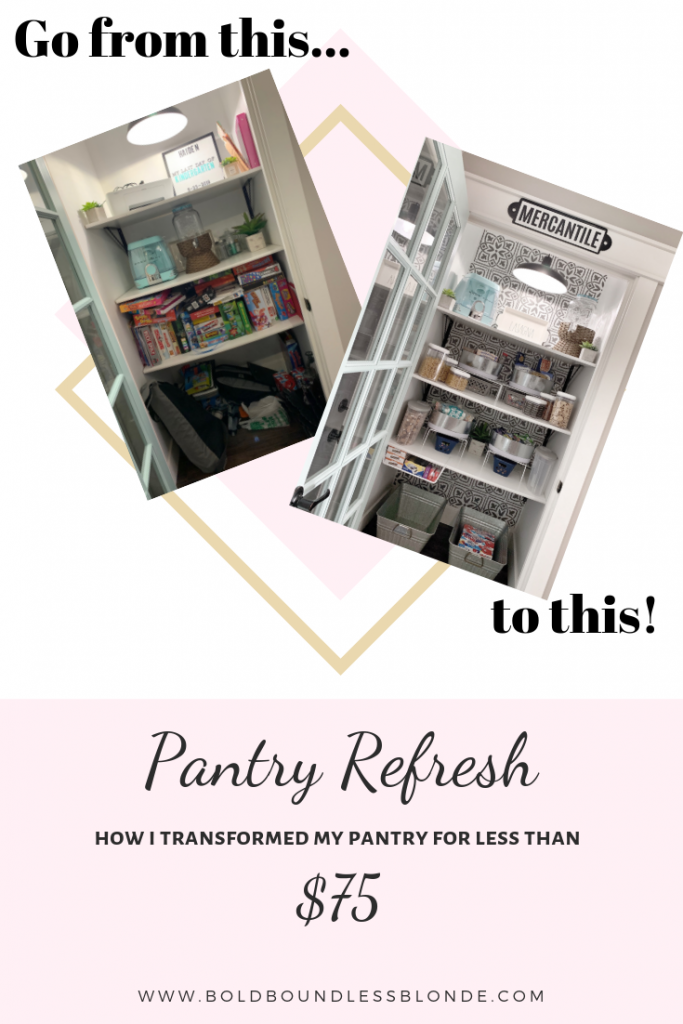
The Before – Hello Hot Mess
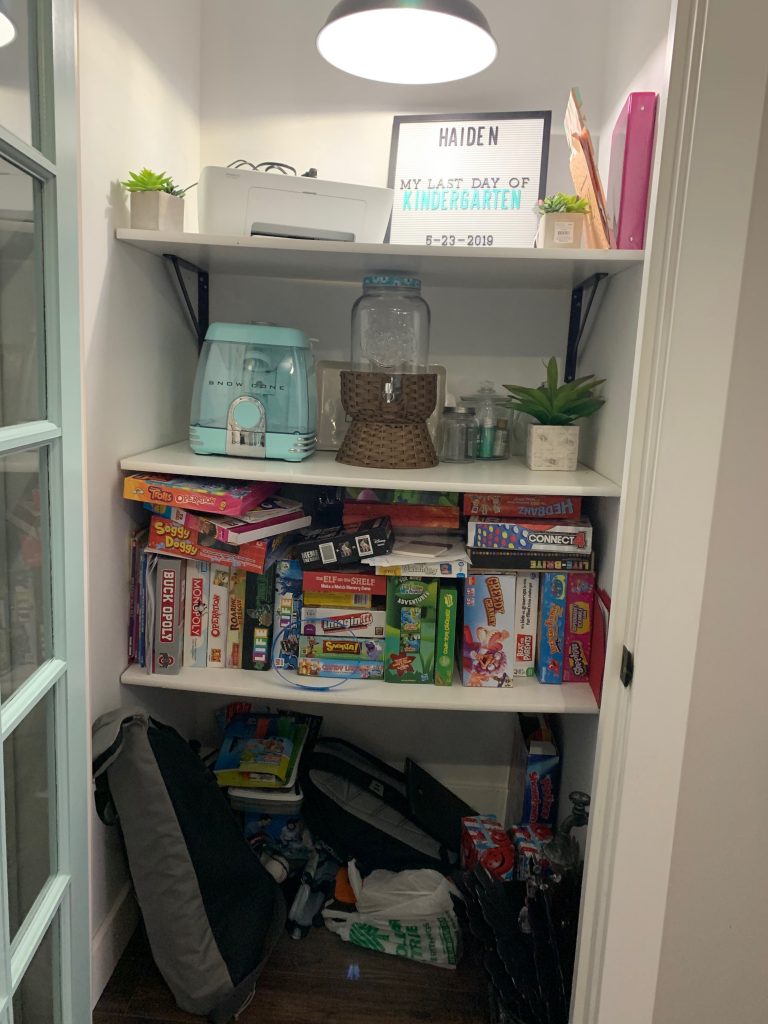
How. Embarrassing. I’d be lying if I said that this pantry hasn’t looked like this for about a year. The pantry is located in the mudroom, so it’s often my go to spot for throwing whatever is sitting out. The worst part is that the door is glass panels so you can see right in to this hot mess. I’ve tried organizing it before but it always just ends up collecting junk. I decided to take all non-kitchen related items out so that I will be less likely to add to it. We will see how long this can last with my kids and husband!
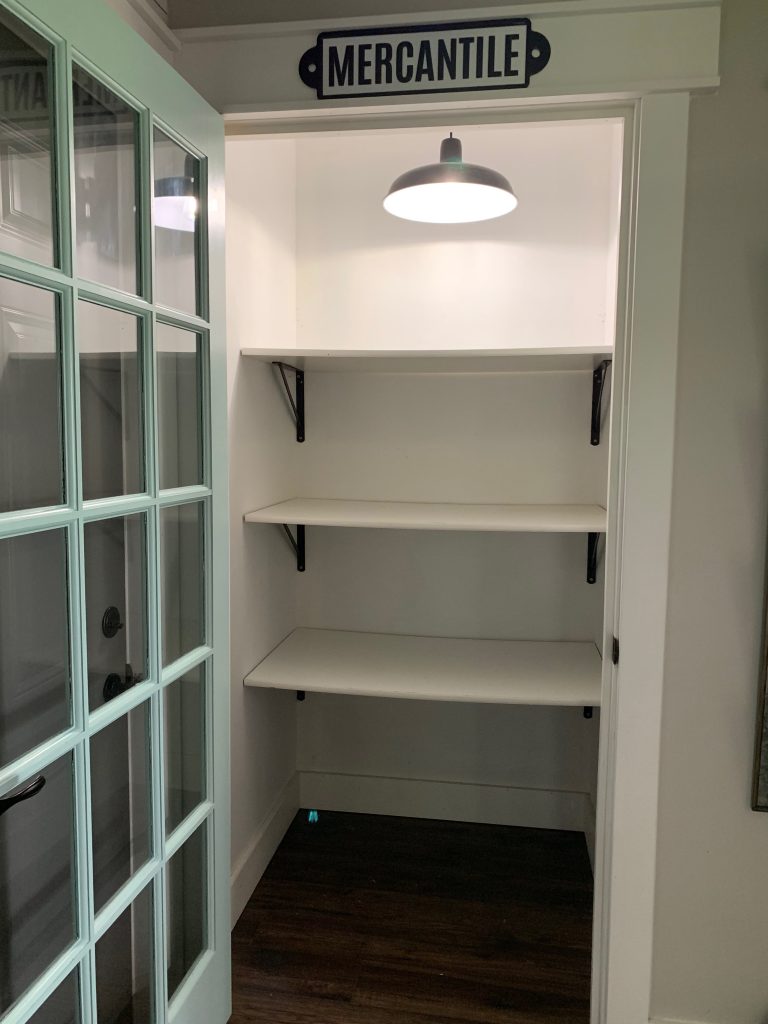
The first thing I did was take EVERYTHING OUT. Its amazing how big the space looked without a years worth of junk piled in it. Next we removed the shelves and brackets so that it was completely bare. Several trips to the basement later and I was ready to get started. First, I gathered all my items for the stenciling.
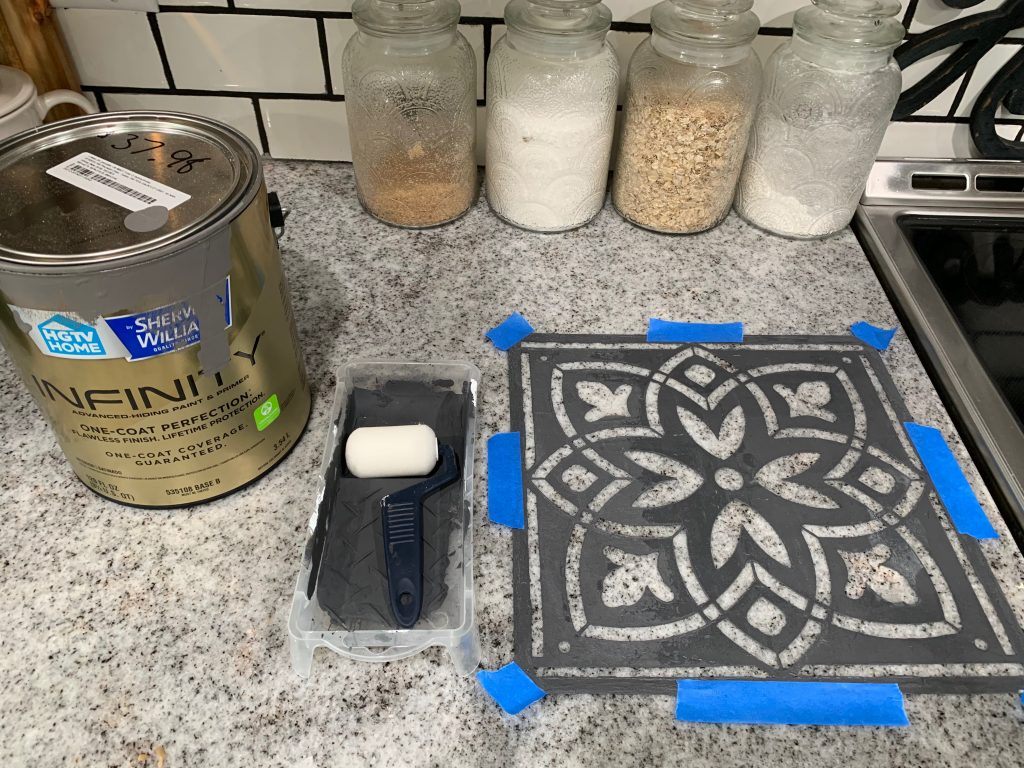
- The stencil is from Michael’s – This will be my 4th time using the stencil for a large project and its still in perfect condition.
- The paint is Sherwin Williams – Gauntlet Gray from Lowes.
- I typically use Rustolem Chalk Paint from Amazon – but I was out of it and didn’t want to wait any longer so I used the leftover paint from our interior doors.
- I recommend using a 2″ foam roller like the one found here. You may think a bigger roller will get the job done faster – but bigger roller means less control therefore I am team mini roller!
- Blue painters tape – you may need to put new tape on throughout the process so keep the roll handy.
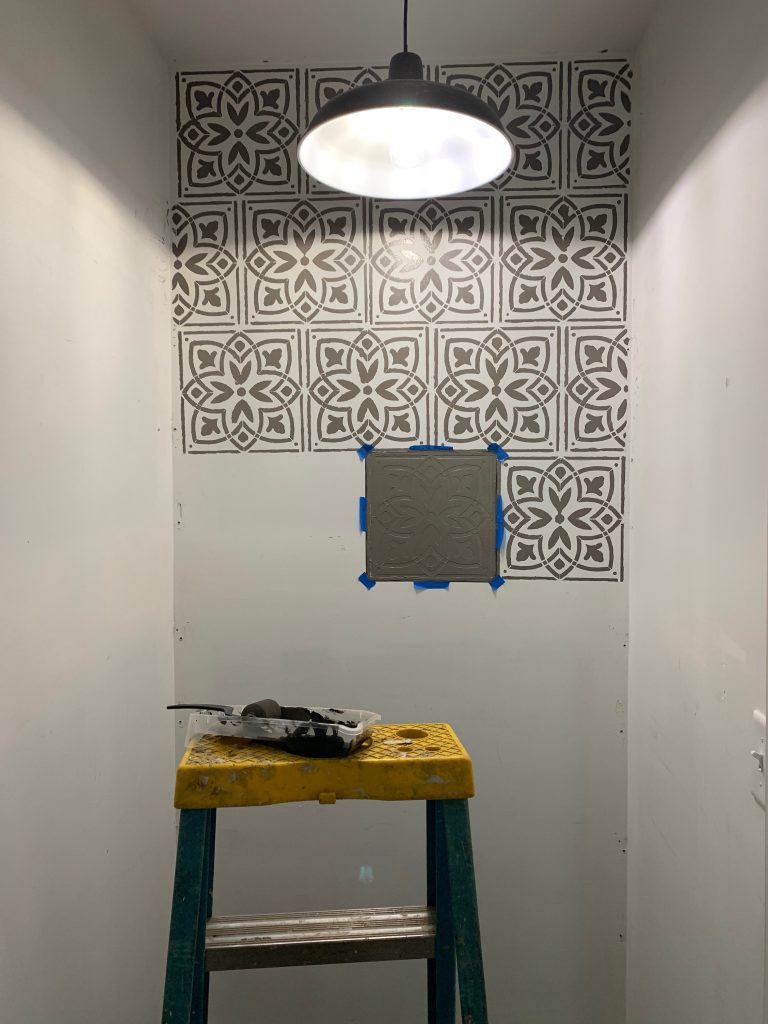
There really is no right or wrong way to get started. Sometimes I start in the middle, sometimes I start from the corner. Regardless, just pick your spot and go for it. Using the ceiling/connecting wall to align your stencil straight, press the stencil down flat using the painters tape.
Getting Started
To begin, with a VERY small amount of paint on your roller, lightly rolling over the stencil. Again – more paint does not get the job done faster! It will create leaks and blobs on your stencil. If your stencil does not come out perfect believe me when I say it is not the end of the world. Instead of trying to get it perfect every time, I just keep some touch up paint handy and fix what I need at the end. For your sanity, I suggest you do the same. When its all said and done the imperfections are so hard to notice. And if someone does mention them, BYE – because you don’t need that type of negativity in your life.
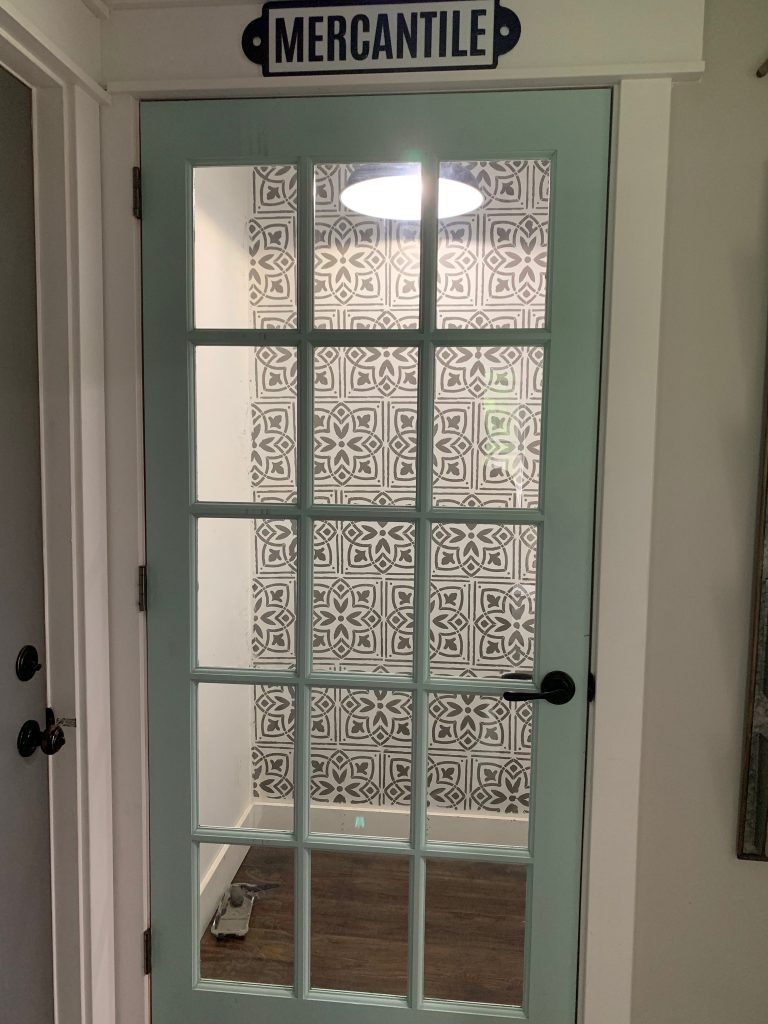
Voila! Just like that you have a gorgeous tile-looking accent wall. At this point I threw on some touch up paint. I knew the wall would mostly be covered so I didn’t put too much effort into it. For more info on the stenciling process visit my Instagram. Now for the fun part.
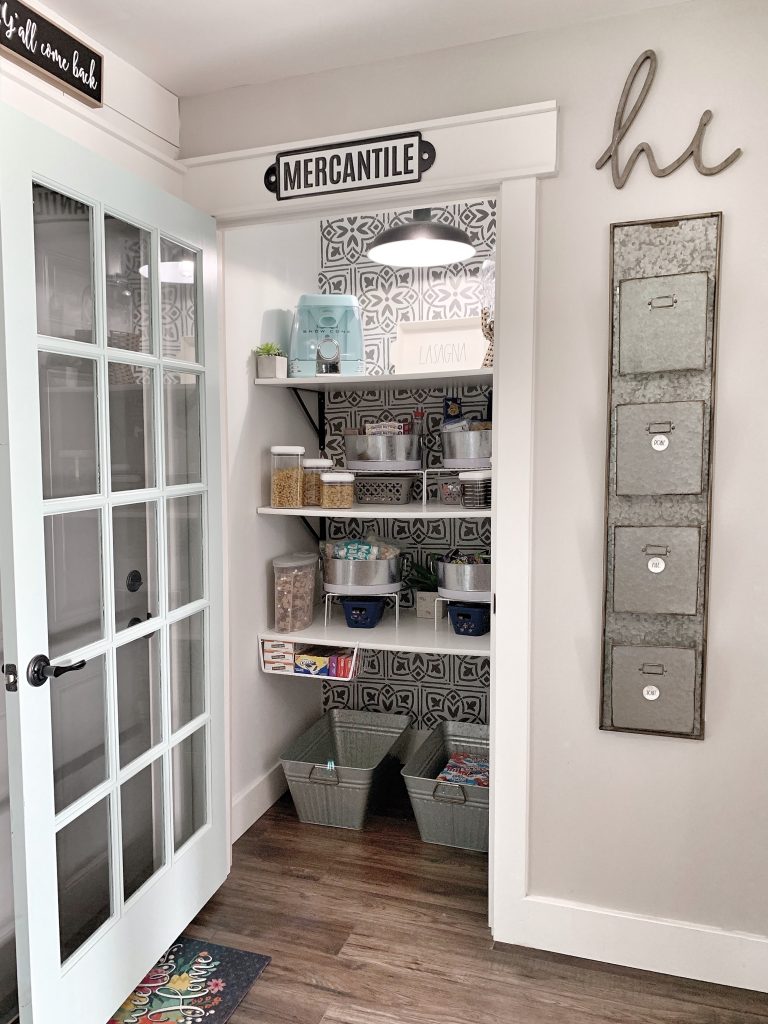
The After – Lookin Fresh!
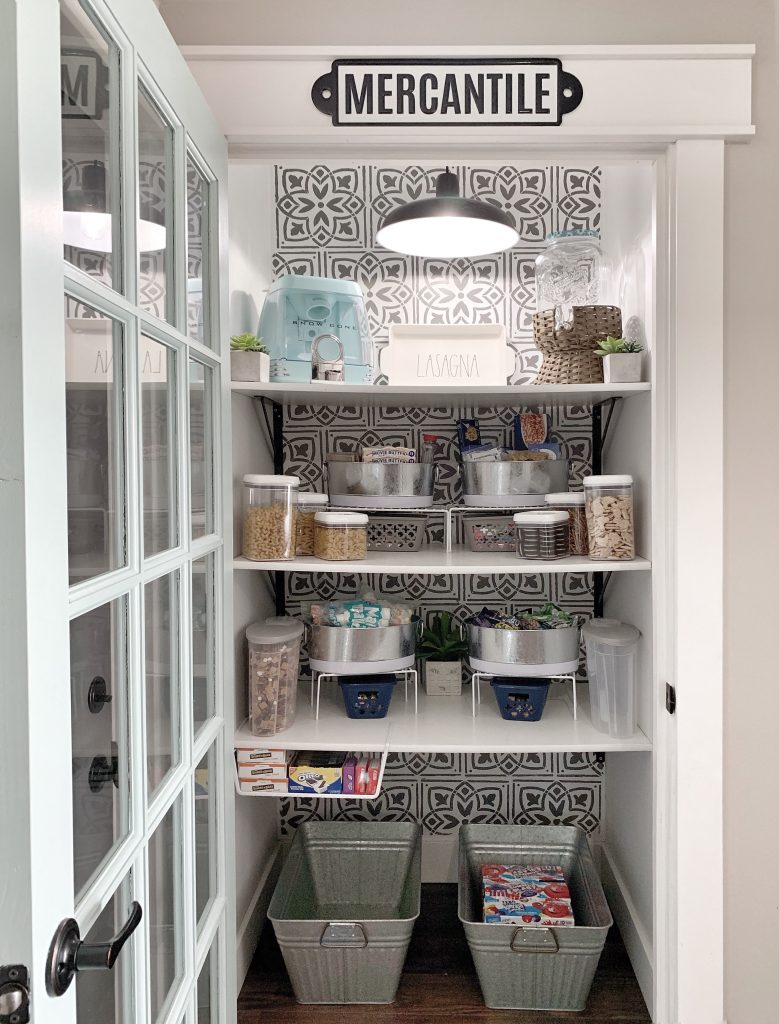
Believe it or not, all of the storage came from walmart (links below) aside from the small gray and blue bins – those are from the Dollar Tree. I put like items together such as pastas, snacks, and, and baking items. This transformation was well worth the couple of hours that it took! Are you inspired to do your own farmhouse pantry refresh? Please be sure to share!
- Large Metal Storage
- Small Metal Storage
- Set of 3 Plastic Storage
- Wire Storage Shelves

If you missed any of my previous home tour posts they are linked below!