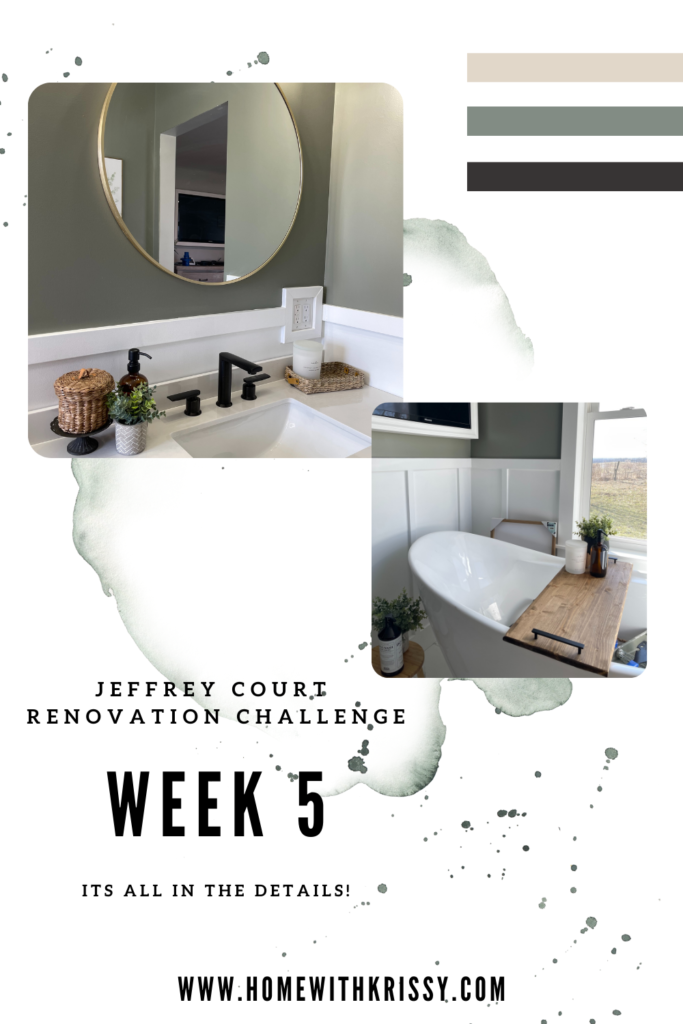
Details, Details, Details people!
Home With Krissy contains paid advertising and affiliate links where a commission is received for the sale of products linked in a post. This blog abides by word of mouth marketing standards. I believe in honesty of relationship, opinion and integrity. The compensation received may influence the advertising content, topics or posts made in this blog. That content, advertising space or post will be clearly identified as paid or sponsored content. I partner with brands and products that I am passionate about and appreciate your support in making this blog successful.
I seriously cannot believe that we are already through week 5. We only have 1 week to go and we will be scrambling to finish in time for sure! I can’t help but laugh at myself for how overzealous I was at the beginning of this project. I jokingly told my husband there was NO WAY this would take a whole six weeks.
Boy was I wrong.
The main delay that we have right now is that we are still waiting on certain materials to arrive. Because of delayed shipping things were kind of at a stand still. I decided to use this time to work on the small details that make our space so special!
DIY Bath Tray
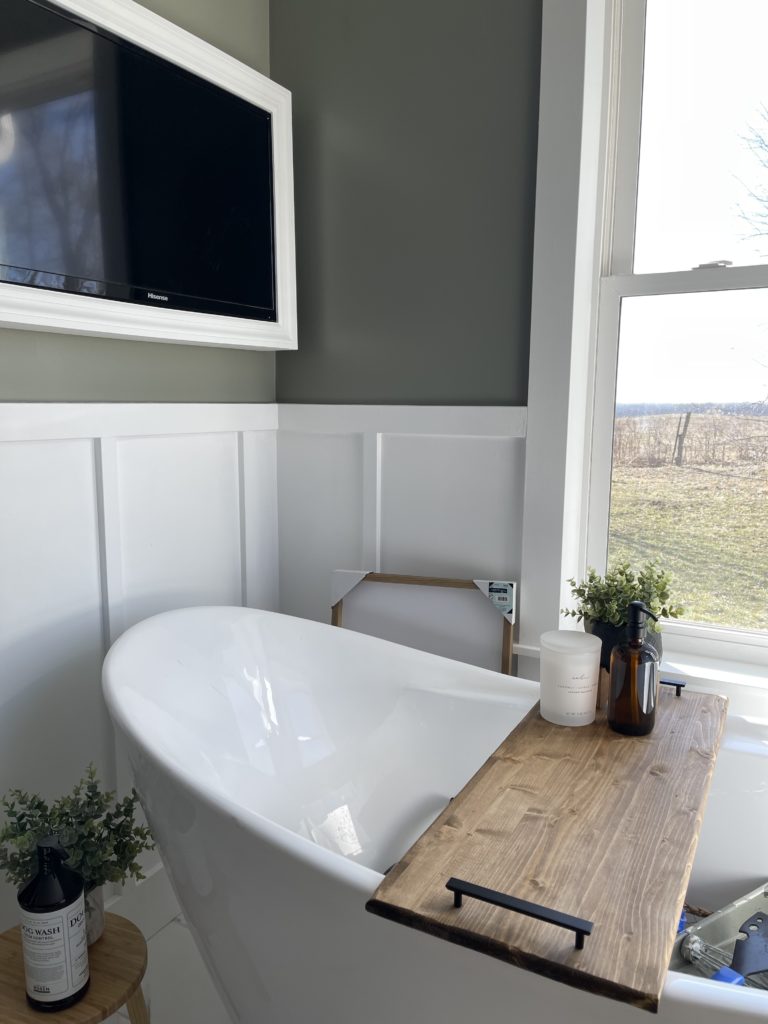
I have always wanted a bath tray to put on my freestanding tub but have never gotten around buying one. After looking at the prices I decided that I could DIY one much cheaper and super easy!
Materials needed:
- 1x16x4 Wood
- Handles (I had two left over from what I used on the Vanities)
- Stain– I used Early American
I chose to use my router on the edges to give it more of a round edge, but this part is totally optional! All that I did was cut the board down to the right length, router the edges, stain both sides, and add hardware.
The whole thing took about a half hour excluding dry time. It was definitely one of the easiest projects of this reno!
Vanity Faucets by Fortis Faucets

I feel like this was such a turning point in the renovation! I have been waiting so impatiently to install all gorgeous Vitrina Widespread Faucet & Brera Push Drain from Fortis! Both are brushed black and absolutely stunning! I absolutely love how modern they look and they are a perfect match to the vanity hardware! This is what I mean when I say I poured my heart and soul into every last detail!
Starting On The Shower
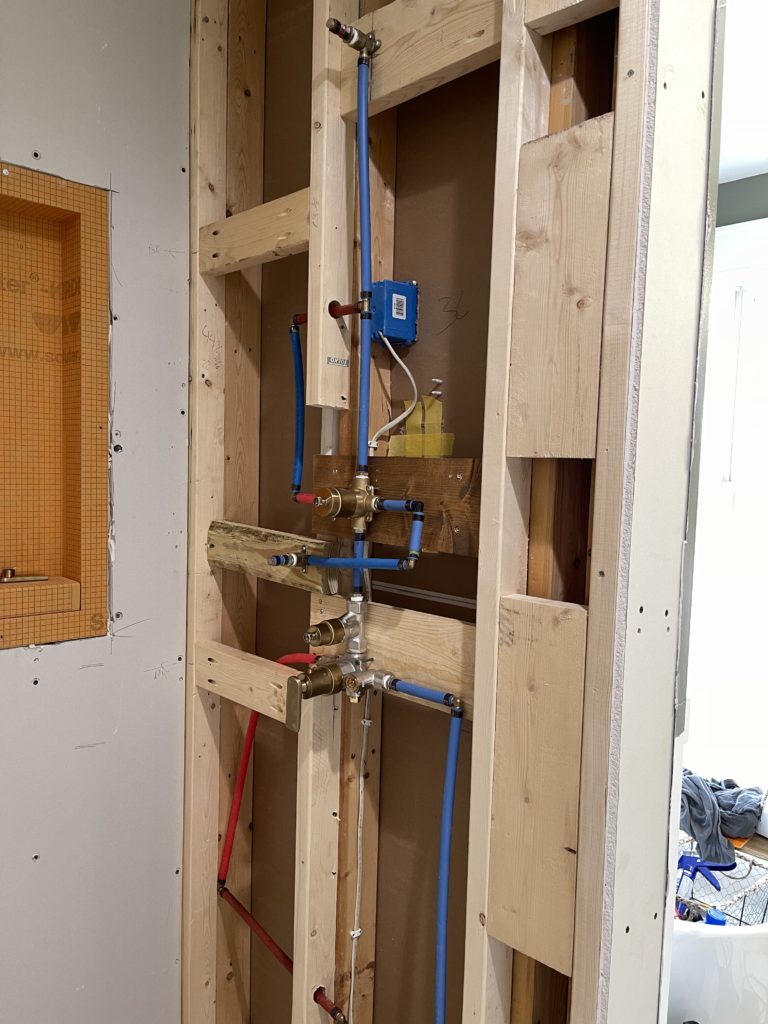
After what seems like an eternity of sharing a bathroom with the kids, this week we finally got started on the shower. Just wait until this beauty is complete. It is pure luxury!
Ive never had a shower with more than one handle, and this bad boy will have THREE! The bottom set will turn the water on and off and control the temperature (Vitrina Thermostatic Valve Trim with 690 Valve) and the top handle will divert the water between the shower head and the hand shower! (Vitrina Diverter Trim with 425 Valve)
Both match seamlessly with the Vitrina Widespread faucets, except one tiny detail… they are GOLD! Ugh, I’m telling you, this is what my bathroom dreams are made of!
Niche Details
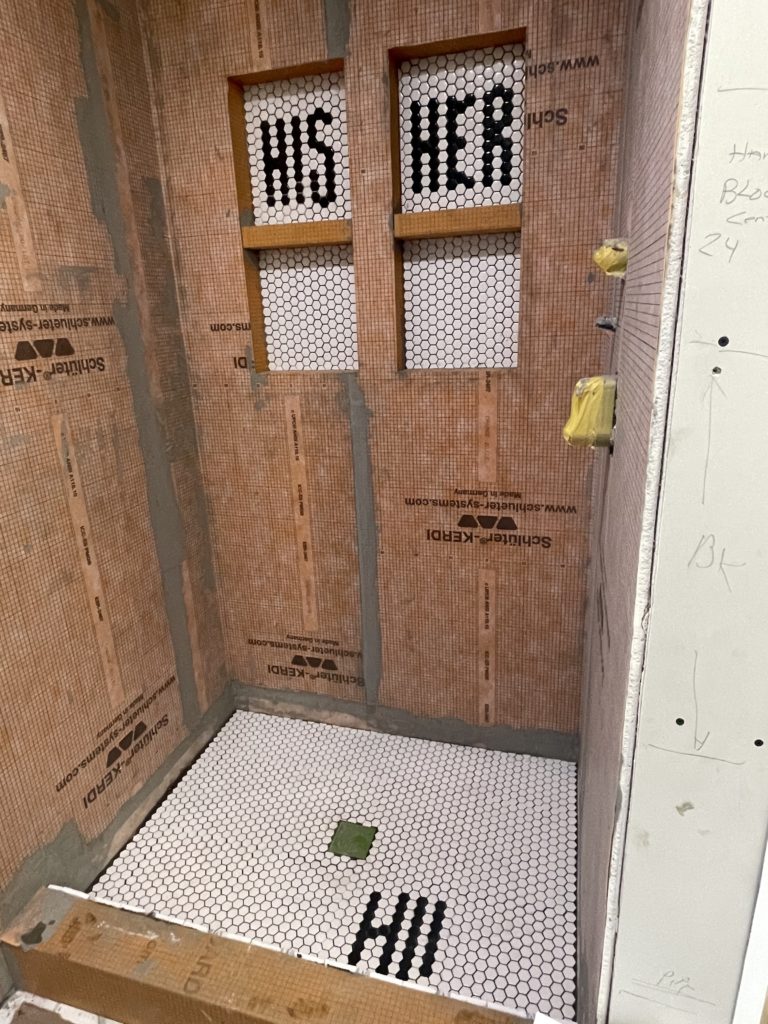
In true “Krissy” fashion, I wanted to do something completely unique in our shower niches. I opted for two niches and used Jeffrey Court Black Out Hex tile to write HIS & HER inside of the Jeffrey Court Gardenia White Tile. Check out my IG stories for my little trick to writing with hex.
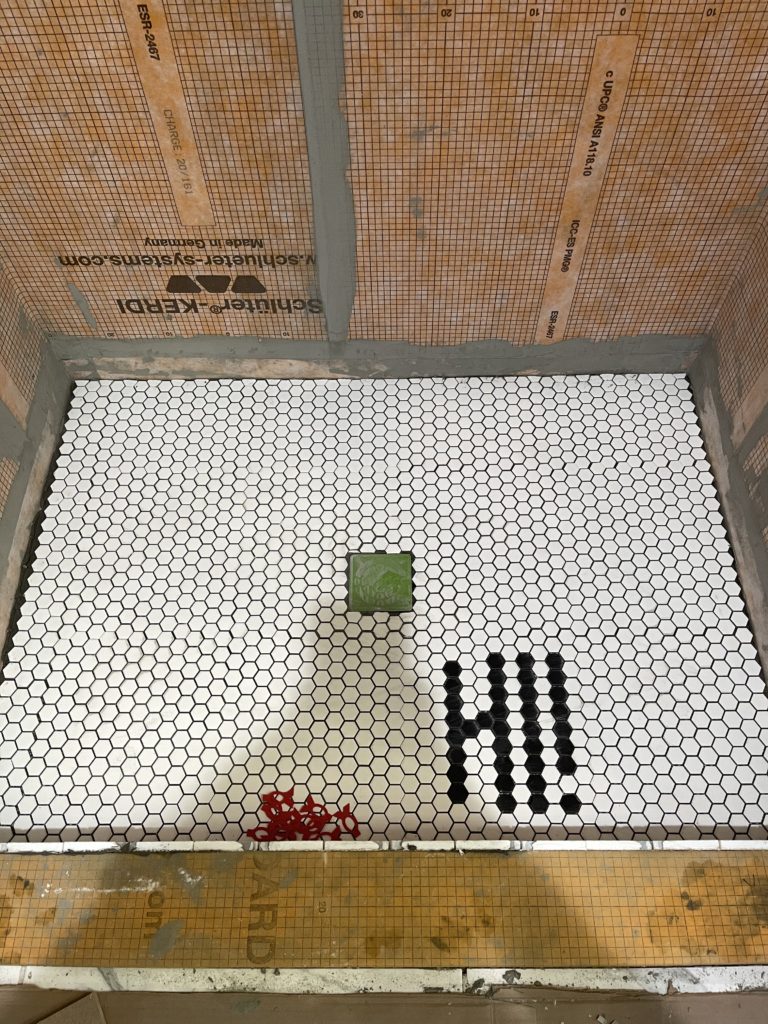
I loved how the black hex looked so much that I decided to add HI! on the floor right where we will walk in from the door! I’m telling you, it’s all in the details!
Don’t forget, you can vote once a day (every 24 hours) for your favorite designer/renovation! Your votes mean EVERYTHING!
Only one week left to wrap it up! Wish us luck! If you have missed any of the previous weeks you can view them here!
– WEEK 1 – WEEK 2 – WEEK 3 – WEEK 4 –
As always, I want to give a huge thanks to our wonderful sponsors for making this whole challenge possible!
– Jeffrey Court – Frog Tape – Sinkology–